Who is this guide for?
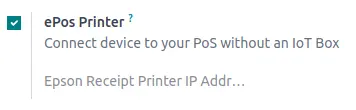
To managers and technicians who want to connect the Epson TM-m30III printer to the establishment's Wi-Fi (2.4 GHz), secure web access (certificate), and integrate it into a POS (Odoo).
Prerequisites
• Epson TM-m30III printer powered on, with paper.
• Prepared business Wi-Fi: 2.4 GHz enabled; same SSID and same password for 2.4/5 GHz (unified network).
• WPA2-PSK (AES) or mixed WPA2/WPA3 (avoid WPA3-only/WEP).
• Ideally, channel 1/6/11 at 20 MHz for 2.4 GHz.
• A computer/phone with a browser, on the same network as the printer after setup.
If necessary, temporarily separate the SSIDs (e.g., MonResto‑2G / MonResto‑5G) to connect on 2.4 GHz, then reunify them afterwards.
Step 1 — Launch SimpleAP mode
• Open the paper cover.
• Press the Feed button: the orange paper LED blinks.
• Close the cover: the SimpleAP menu starts.
• Press Feed 5 times quickly.
• Press Feed once for about 1 second, then release.
• A ticket prints with the temporary SSID, password, and administration IP address.
Step 2 — Connect to the temporary access point
• From your computer/phone, join the indicated temporary Wi-Fi network (EPSON_…).
• In the browser, enter the printed IP address (WebConfig interface).
Step 3 — Register the establishment's Wi-Fi
• In WebConfig, open the WLAN/Network settings.
• Select the business SSID, enter the password, save, and restart if prompted.
• The TM-m30III joins your Wi-Fi and prints its new local IP address.
Step 4 — Test the connection (IP, ping, status)
From a workstation on the same network:
• Browser: http://IP_ADDRESS and https://IP_ADDRESS
• Windows PowerShell: ping -n 4 IP_ADDRESS; Test-NetConnection IP_ADDRESS -Port 80; Test-NetConnection IP_ADDRESS -Port 443
• Print the network status and check the displayed SSID/IPv4.
ping -n 4 IP_ADDRESS
Test-NetConnection IP_ADDRESS -Port 80
Test-NetConnection IP_ADDRESS -Port 443
Step 5 — Secure web access (certificate & HTTP/HTTPS)
Goal: avoid browser alerts in HTTPS and maintain HTTP compatibility if necessary.
• Export the certificate: WebConfig → Security / SSL/TLS → Export (.cer/.crt).
• Allow HTTP in addition to HTTPS (disable 'HTTPS-only') if needed: WebConfig → Security/Network → HTTP/HTTPS Settings → Save/Restart.
Certificate installation – depending on the OS
Windows 11/10 (simple method)
• Double-click the .cer → Install the certificate.
• Choose "Local Computer" → place in "Trusted Root Certification Authorities" → Finish.
• Restart the browser.
macOS
• Open Keychain Access → System keychain → drag and drop the .cer.
• Double-click → Trust → Always Trust → validate with the admin password.
• Restart the browser.
Android / iOS / Linux (summary)
• Android: Settings > Security > Install certificate (CA).
• iOS: Install the profile, enable trust in Settings > General > Certificate Trust Settings.
• Linux: /usr/local/share/ca-certificates + update-ca-certificates; Firefox: import into its store.
Step 6 — Final tests: HTTP and HTTPS, no alerts
• http://IP_ADDRESS → WebConfig responds.
• https://IP_ADDRESS → no more warnings; the padlock indicates "secure connection."
• In PowerShell: TcpTestSucceeded = True for 80 and 443.
• If persistent alert: reinstall the certificate in the correct store, check the date/time, restart the browser.
Step 7 — Fix the IP address (DHCP reservation)
• Retrieve IP/MAC/Hostname from the status sheet.
• In the router admin: DHCP > Reservations → add the MAC of the TM-m30III + fixed IP.
• Restart the printer and check that the reserved IP is in use (ping/ports 80-443).
• Update the IP in the POS (or use the hostname if available).
Step 8 — POS integration (Odoo) + print test
Pre-checks: ePOS-Print enabled, HTTP/HTTPS configured, same subnet, ports 80/443 reachable. On the POS side: POS app installed and, if required, Epson ePOS driver/connector.
• Open the Point of Sale configuration.
• ePOS / Network Printer section: enter the reserved IP address of the TM-m30III.
• Select the ePOS-Print protocol (if available).
• Save and then click "Test Print" → ticket and success message expected.
Tip: if your POS is on HTTPS, prefer https://IP (certificate installed) to avoid mixed content.
Quick Troubleshooting (checklist)
• 2.4 GHz enabled, same SSID 2.4/5 GHz (or temporary separate SSID to force 2.4 GHz).
• Same subnet between POS terminal and printer; no blocking VLAN.
• Local firewall/router: allow local IP, ports 80/443.
• ePOS-Print = Enable in WebConfig.
• Changing IP address: DHCP reservation.
• Still no printing: restart the printer, reprint the network status, redo SimpleAP if needed.
Summary (TL;DR)
• SimpleAP → retrieve temporary SSID/PWD/IP.
• Connect to EPSON Wi-Fi → enter the commercial Wi-Fi → obtain the local IP.
• Test browser/ping/ports → export and install the certificate → (optional) allow HTTP.
• Reserve an IP in the router.
• Configure the IP in the POS (ePOS-Print) → test printing.